Update (June 14, 2021): The GitLab pipeline is failing for the last 2 times. It seems it’s not working correctly for me. However, it’s still working for some people, so you might want to give it a try, but there’s no guarantee.
I have 3000+ pages and 100+ PDFs (and, other files) uploaded to Notion.
And, since the offline feature is not yet available, it’s very important to take regular backups of your Notion data.
But, taking manual backups on a regular basis is not easy.
So, I started searching for some automated ways to backup the entire Notion account and luckily, I found one.
Related: Why it’s important to learn Git as a developer
Automated Notion Backup
All thanks go to Artur Burtsev who wrote an amazing article explaining how to automate the process.
Let’s proceed.
Since Notion doesn’t provide the API access yet, this method mimics the Notion’s manual backup behaviour and automatically sends the backup file to the remote GitLab repository.
First of all, register a free account with GitLab (if you don’t have one already).
GitLab’s free account lets you store data up to 10 GB which will be enough for most of the users. If you have more than 10GB of data in Notion, you can upgrade your GitLab account otherwise it won’t work for you.
#1. Fetch “token_v2” and “spaceId”
Be careful! This is the most complicated and tricky part of the entire process.
In this step, we will be extracting token_v2 and spaceId from Notion’s “Export all workspace content” feature.
To make it easy, here’s the step-to-step guide to proceed:
- Open Google Chrome and log in to your Notion account
- Navigate to Settings and Members > Settings
- Open the Chrome DevTools by pressing
ctrl + shift + j(on Windows/Linus) orcmd + option + j(on macOS) - Now proceed with the next instructions carefully
- Click on the Network tab
- Enable XHR filter
- Clear the console by clicking on the cancel icon
- Click on the “Export all workspace content“, select your preferred Export format and click on the Export button
- Select enqueueTask from the Name column
- Move to the Headers tab and scroll down till you see “cookie:“
- Copy token_v2 and note down in a text note by name NOTION_TOKEN_V2
- Copy spaceId from Request Payload section and note down in a text note by name NOTION_SPACE_ID

The first and most complicated step is done.
#2. Set up GitLab for the backups
After logging in to your GitLab account, go to Settings → Access Tokens to get an access token with proper rights.
Provide any name to the Personal access token, check the write_repository option and click on the Create personal access token button as shown in the screenshot.
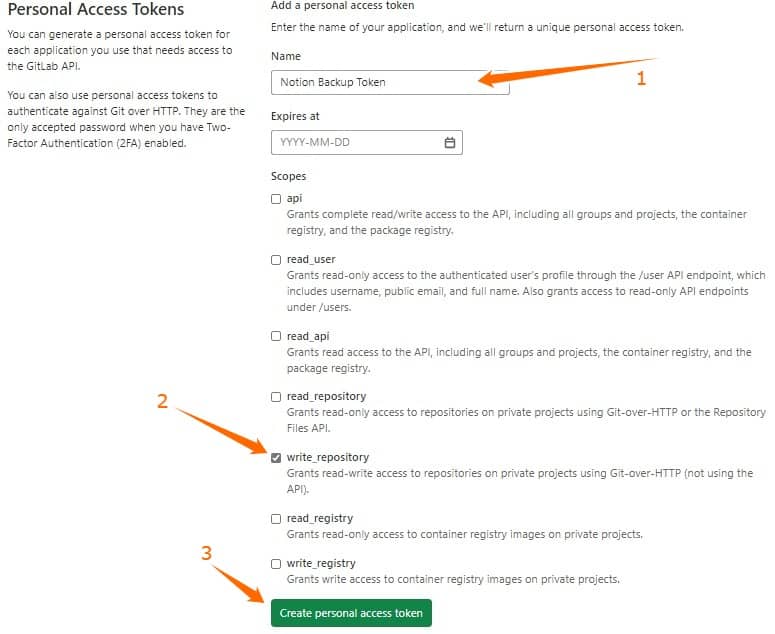
Copy the “Your new personal access token” from the next screen and save it in a text note by name CI_PUSH_TOKEN.
Now, Create a new blank project, give it any name of your choice and make sure the Private option is selected. Click on the Create Project button as shown in the screenshot.
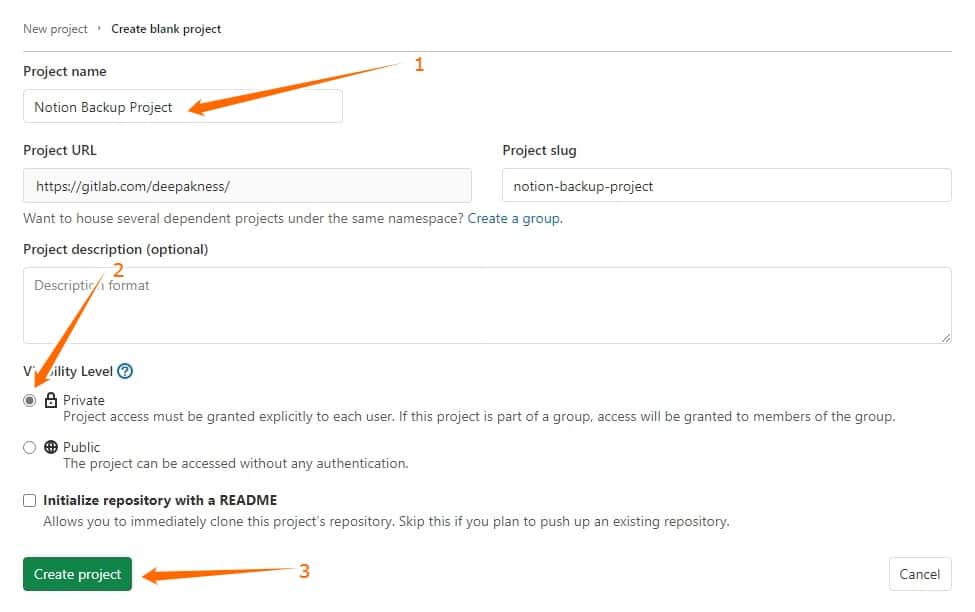
Your new project is created.
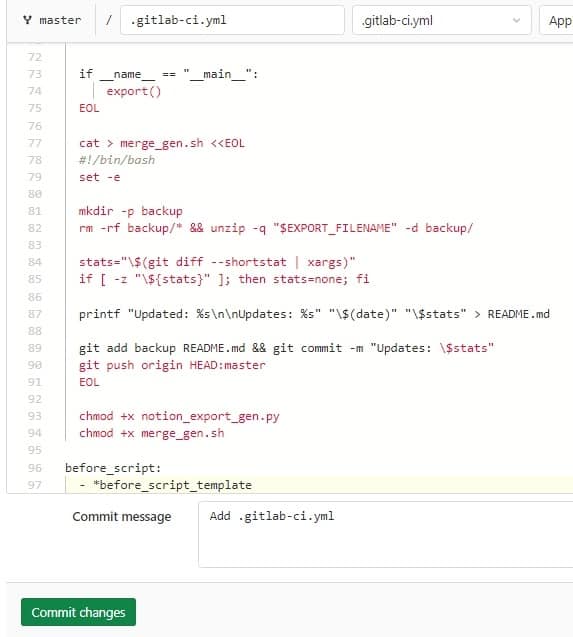
Now, set up CI/CD script by clicking on the set up CI/CD option which will open an editor for the file .gitlab-ci.yml.
Go to this link, copy the whole script, paste into the file .gitlab-ci.yml and Commit changes without making any change.
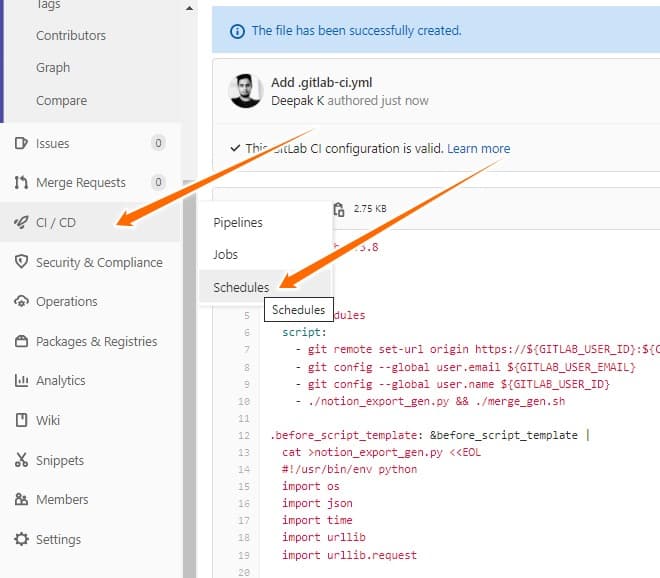
Now, it’s time to schedule the backup job.
Click on the Schedules option under CI/CD from left side menu options and create a New schedule.
A new form will open, enter everything as shown in the screenshot.
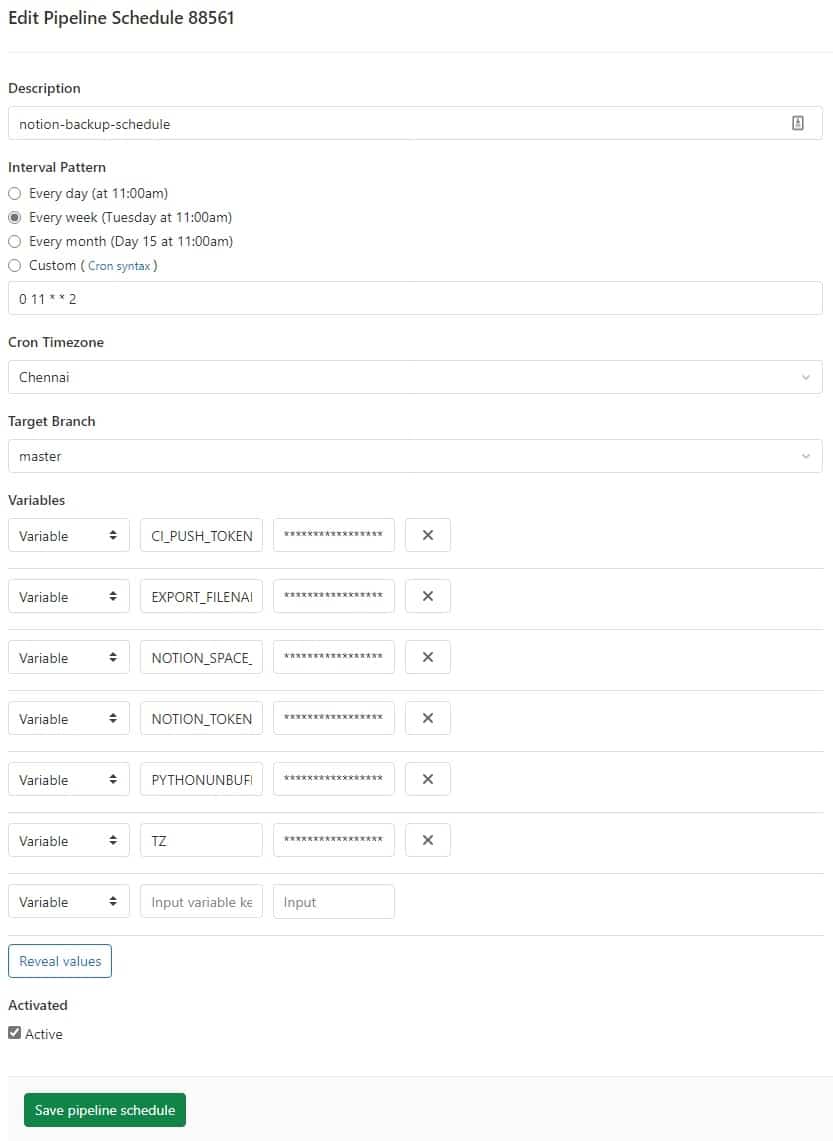
Here’s what you need to put there:
- Description: Any name of your choice
- Interval Pattern: Every day, Every week, or Every month
- Cron Timezone: Your timezone
- Target Branch: master
- Variables:
- CI_PUSH_TOKEN – Your GitLab personal access token
- EXPORT_FILENAME – /tmp/export.zip
- NOTION_SPACE_ID – the spaceId that you copied in #1
- NOTION_TOKEN_V2 – the token_v2 that you copied in #1
- PYTHONUNBUFFERED – 1
- TZ – Pick your “TZ database name” from this Wikipedia page
- At last, click on the Save pipeline schedule button
Now, under the CI/CD > Schedules option, the newly created Pipeline will appear, immediately.

And, click on the play button to test if the backup process is working correctly. It will take a few minutes before the green checkmark appears in the Last Pipeline column. The completion time depends upon the number of pages you have saved in your Notion account.
And, once it turns green, it means your setup is successful. Your Notion data would be automatically be backing up on a regular basis.
Note: If you would like to see the logs then you can click on the numbered link like #12345679 in the Last Pipeline column and then click on the running job.
After the task completes, a folder named “backup” will be created automatically which contains all your Notion files.
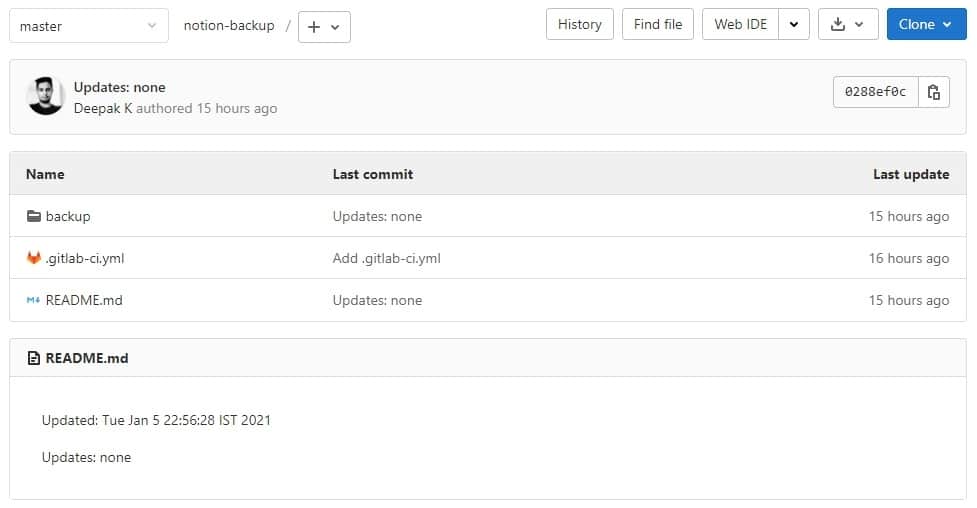
If you want a local copy of all the files, you can clone the complete GitLab project repository to your computer by using the git clone command.
For that, click on the Clone button (top right corner, as shown in the screenshot above) and copy the Clone with HTTPS option. Open up your Terminal (in Mac or Linux) or PowerShell (in Windows) type the following command:
git clone https://gitlab.com/deepakness/notion-backup.gitSince the GitLab project that we created is Private, it will ask you for your GitLab login credentials and as soon as you provide that your Notion files will start getting copied to your computer.
But again, there is no point in saving a local copy after this long process, you could have simply downloaded directly from Notion.
This process just helps you keep your Notion data at more than 1 place by taking automated backup, regularly.
That’s it.
Stuck somewhere? Just let me know by dropping a quick comment.
Leave a Reply to ConfusedCat Cancel reply